Monday, August 15, 2016

Hand-Painted Teacher's Pencil Shoes

My hand-painted pencil shoes have been receiving a lot of attention lately, especially after being featured by @targetteachers' Instagram!  They've received more likes and comments than any other picture I've posted on Instagram, and have been the subject of countless direct messages from followers who want more information about how I made them.  Well, here is everything you need to know about making your very own pair!

{If you aren't up to the task of making your own, send me an email at primarycircus@gmail.com to inquire about ordering a custom pair!}


THE MATERIALS:
Start with a pair of white canvas shoes. I bought mine from Target for $16 or $17. I believe Walmart also sells an inexpensive pair as well. You will also need:
~ Acrylic paint: Pink, Yellow, Gold (or very light brown/tan) Black, and Green
~ Paintbrushes: One very small, and one medium-sized
~ Painters tape/masking tape
~ Mod Podge


Remove the laces from your shoes before you begin. Then use painters tape (washi tape will work too, in a pinch) to mark the edges of the pink "eraser" portion of your shoes.  Line up your shoes to ensure you mark both shoes at roughly the same place.


Paint the heel of each shoe pink.  I needed to use several coats of paint, but you'll be able to tell exactly where you may need a little more coverage once it dries. (As a rule of thumb, I like to let each coat of paint dry before adding another layer.)


After completing the heels, I move on to paint the rest of the shoe yellow, taking extra care between the shoelace holes and along the edge of the rubber sole. I like to use a tiny (like, really tiny) brush for these areas, and then a larger brush (like the size that comes with most kids' watercolor trays) for the bigger areas of canvas.  I found that it also helps to thin the paint a bit with water when getting into the trickier areas. (Keep in mind however, the more you dilute the paint, the greater the number of paint layers you'll need to apply.)


It's not necessary to go all the way to the edge of the toe, since this area will be painted two other colors.  (But don't forget to paint the top of the tongue flap inside as well!)


Here I made a scalloped line with my paintbrush before filing in the toe area with more gold paint. There is a twinge of shimmer in the gold paint, but once the entire shoe is finished it looks nice and just adds a bit of dimension (not flashy at all). 


Finish filling in the rest of the toe with gold paint to represent the wood of a sharpened pencil.


Just like I did with the gold scallops, use a tiny paint brush to draw a slightly curved line with black paint to mark where the black will go.  Start off making your line closer to the tip of the shoe, rather than further. (That way you can just add a bit more paint if you don't like the curve you made, or if one toe is a bit different from the other. 

When doing the toes, I like to keep both shoes side by side so I can ensure both the left and the right shoes are painted evenly. 


Let everything dry again before going back to touch up any areas that need a bit more coverage. (As I said before, it's a lot easier to tell where you need an additional coat once it's completely dry.)

Once you've added all the extra coats of pink, yellow, gold, and black, and everything is completely  dry, it's time for the trickiest part of all: the double green lines, and the black No. 2.  Again, do not begin this step until the yellow paint is absolutely, 100% dry. (Trust me. You will mutter - or scream - words that are not appropriate for the classroom.)  If you paint over wet yellow paint with black paint, the colors will bleed together in a rush of swirled liquid, while you watch the lines of your carefully crafted "N" (the beginning of No. 2) travel half an inch across the canvas. 

If this does happen: carefully blot the offended area with a paper towel, and let everything dry. (Yes, it will still look pretty messed up at this point.) Then, once dry, paint over the messed-up area with yellow paint. You may need several coats to cover your mistake, but it should cover eventually. Then try again! (And even if there is a faint smudge peeking through the yellow, no one is going to notice once the shoes are on your feet.)

************************

When painting the No. 2 and the green stripes, use a veerrrrrryyy thin paint brush. I also recommend thinning the paint a bit so that the brush glides easily across the canvas of the shoe. If you need to, you can write it with a pencil first, and then paint over the pencil marks.  (You could even do the whole thing with a black Sharpie if you'd like, but I personally prefer the look of paint.)

For the green stripes, I drew them on with my paintbrush free-hand, but you could also use painters tape to ensure a perfect line. 

Once again, allow both shoes to completely dry. Then, use a thick paintbrush to coat the entire surface with a (not thin, but not too thick either) layer of Mod Podge.  I used two layers, letting everything dry between coats. And don't panic when it appears that you are ruining your handiwork with a milky-white layer of glue. It will all dry clear, and prevent the paint from running off your shoes the second you get hit with a neighbor's lawn sprinkler while walking your dog. 

{That being said, THESE SHOES ARE NOT WATERPROOF.  The Mod Podge will make the paint fairly water-resistant, however if the weather forecast calls for rain, I recommend leaving the pencil shoes at home.}

Good luck!  I would love to see your creations! If you post them on Instagram, please tag me @primarycircus so I can get a peek!  


Friday, March 25, 2016

Bookpedia: My Classroom Library Catalog

How many times have you seen an awesome book sale, but then wondered to yourself, "Which Magic Treehouse book was it again that I only have one of?" Or, "Which Dr. Seuss book did I loan to my fellow teacher and never got back?"

I searched for the best computer programs for cataloging a personal/classroom library, and after trying bunch of them, Bookpedia was the best option for me. It helps guide my book purchases so my library isn't lopsided in terms of number of titles and reading levels, and has a checkout system for me to track who I've loaned books to. 

The interface is very similar to iTunes, so it feels very familiar and intuitive to use, and I love that I can add my own categories for sorting books. 

There were a few things I had to figure out on my own though, to make the program more tailored to a classroom setting.  After purchasing an downloading the software, here's a step-by-step guide to setting up your Bookpedia for your classroom library.

You can use the camera in your computer/iPad/iPhone to scan a book's ISBN barcode, and Bookpedia will then run the ISBN number through several online databases to pull up the book's title, author, publisher, number of pages, genre, and a picture of the book's cover, automatically filling in the entry fields for you in Bookpedia. Scanning your books makes the process of cataloging your library go so much faster. Which brings me to my first piece of advice:

STEP 1: Connect your Bookpedia to the AMAZON DATABASE
Bookpedia's default online database for pulling book titles, authors, etc. is something called Doghouse. You do not want to use this database as I found it will have few (if any) of the books you own.  When a book is not found online after you've scanned it, you must manually enter each piece of information about the book (which would take forever when multiplied by the total number of books you own). 

By connecting to Amazon's database of books, you'll make the process of inputting your book entries faster and more accurate.  This link explains the process for connecting to the Amazon book database. 

http://bruji.com/help/bookpedia/adding/adding.html#amazon

You have to set up an Amazon Web Service (AWS) key, and then follow the directions for entering those numbers into your Bookpedia settings. It takes a little bit of time, but once you're finished, you'll be glad you did, because it will make all the difference in how easy it is to enter books into your Bookpedia catalog. 

STEP 2: ADD CUSTOM FIELDS
I don't know about you, but I have multiple copies of the same title for many of my books (whether they're guided reading sets or just a part of my regular library). Bookpedia does not have a default field for recording how many of each book you have. You could simply add multiple entries for each book (so you would see the same title, say, three times in three separate listings, if you had three copies), but I didn't want to add that much visual "clutter" to the interface. You can add a Quantity field by going to Preferences. 

These are the custom fields I've added to my Bookpedia:
--QUANTITY--
--GUIDED READING LEVEL--
--LEXILE--
--DRA--
--GRADE EQUIVALENT LEVEL--

This is a screenshot of the information I've input for the book Dixie
I downloaded the (free!) Scholastic Book Wizard app to find the reading levels for all of my books.  Every once in awhile I'll search for a book that I can't find within the app, but for the most part it's pretty good about having the titles I'm looking for.  

STEP 3: MAKE A PLAN
Depending on how many books you own, it will take a big chunk of hours to enter them all. But make sure you start in one section of your room and move methodically through your collection.  Otherwise, you'll be pulling your hair out trying to figure out whether a.) you've already scanned this book, or b.) this is simply another copy of the book you scanned already. I'm going to start putting a tiny stamp on the inside of the cover of books I've input, so I don't run into this problem again. 

STEP 4: KEEP IT UP
As you add to your book collection (Hello, Scholastic points!) make sure you continue to scan new books into your database. 


Saturday, March 5, 2016

Southern California Kindergarten Conference Blogger Bash

Whew!  I'm finally back in my own house and laying in my own bed, after a long (but fun and wonderful!) two days in Pasadena, California for the Southern California Kindergarten Conference.  This is hands down, one of my favorite professional developments each year.  I really have to give my principal a huge shout-out/hug of thanks for consistently letting me take the Friday off for the Pre-Conference session, and for footing the (rather large) bill for registration year after year.

This year was especially exciting for me, because I was a featured blogger for the first time during the Blogger Bash on Friday night!  It was a humble honor to sit at the bloggers' table with some of the best teacher-authors I know.  (Ummm, any of you heard of Katie Knight and Kelley Dolling HELLO?!?  I had the opportunity to see both of these ladies' pre-conference presentations, and they were AH-MAH-ZING.)*

*Side note: You should all binge watch Happy Endings on Hulu during your Spring Break this year.

During the Blogger Bash, all the bloggers and I got to rotate around to each table and answer questions about our blogs.  For all of you who weren't able to make it to the Blogger Bash, these are the two most frequently asked questions I was asked last night: 

First of all, let me just say that I wish I had more time to write blog posts, and that I am in AWE of the women who are able to write on a consistent basis (as opposed to me, who has only written a few times this calendar year so far).  But, the posts I do write, are nearly always written between the hours of 11:30pm and 2:30am, when I am unable to shut off my brain and fall asleep.  Does that mean that the next morning when I wake up at 6:00am, I am an exhausted zombie?  That would be a big fat YES.  I read somewhere that you should schedule times to write, just like you would set aside time for an appointment.  I would like to get to that point, but if I'm going to make time for something other than exhaustedly putting on sweats and crawling into bed at the end of the day, I want it to be for the gym.  (Because let's get real: summer is around the corner, and this body is not bikini-ready.)


When I first decided to begin my blog, I was terrified to begin.  I racked my brain, trying to come up with ideas that I thought would be "blogworthy."  Finally, I had to just force myself to begin writing, regardless of the degree of importance I believed others might assign to my ideas.  No matter what anyone thought (although this was a mute point at the time, because no one was reading my blog yet), I simply began to write.  For all of you who are considering a blog, and wondering how you start, you just do.  You simply begin writing, about anything, and then bravely press "Publish."  


Be brave, dear teacher friends, and take the plunge if you feel like it's been put on your heart to venture into blogging.  And TRUST ME; it gets easier and easier with each subsequent click of that little orange button. Before you know it, you'll be like this: 


Friday, February 19, 2016

Starting Whole30, Attempt #2

I have heard so many incredible things about Whole30: that it helps your sleep, makes you feel happier, gives you more energy . . . the authors of Whole30 call it Tiger Blood.  So, I'm giving it a go (again).  I started Whole30 last month, but fell off the wagon on Day 10.  Looking back at the Whole30 timeline, I feel embarrassed to be such a cliche; apparently the day most people quit is on Day 10 or 11.  Well, I'm giving it another go, and today is DAY 1 of my new resolve to stick it out the entire thirty days this time.  (Or at least make it to the Tiger Blood stage.  I've got to see what everyone's raving about.)

I'll admit, the main reason I'm doing Whole30 is to lose weight.  I KNOW, you're supposed to do Whole30 for the "non-scale victories," but I would like to lose twenty pounds, and if I'm going to stop eating all the terrible (but delicious) things, I may as well do it in a way that will make me feel better, right?  In the ten days that I was still on the wagon, I lost six pounds, so I'm guessing (hoping) I'll lose at least ten this month if I stay on track.  (And yes, I gained four of those pounds back in the several weeks since.  When I say I fell off the wagon before, I hit the ground hard.)

So, of course today, Day 1 of Whole30, had to be Dollars for Donuts Day at school.  All the kids bring a dollar to buy a donut, and the money raised goes towards the school's fundraising goals.  Temptation slapped me right in the face within hours of my first day.  I told myself the donuts looked stale, and that I wouldn't have wanted one anyway.  (This is a lie.  They looked delicious.  Sometimes you have to lie to yourself to make yourself feel better.)

So instead of eating a donut, I'm spending my recess writing a blog post about how much I wish I was eating a donut.  Wish me luck, people.  My sugar dragon is already rearing its ugly head.


Thursday, February 18, 2016

Open House, Classroom Set Up, and Miscellaneous

Well, one more Open House has come and gone! Catholic Schools Week is always a really fun, but really busy (and slightly stressful) time of the year. The week leading up to Open House (which is always on a Sunday morning) is all about beautifying your classroom and hiding the piles of clutter that inevitably make their way onto your desk.  Everything needs to be clean, neat, and beautiful for that three-hour window of time that students and parents, as well as prospective students and parents come waltzing through the door. 

If you teach at a public school, the purpose of Open House is to showcase to the parents everything the students have been learning and creating.  However, at a Catholic school, Open House is actually for marketing to prospective parents. While it's true that the majority of my students come with their parents to show them around our classroom, I actually spend more time talking with and answering questions from parents who are considering enrolling their child in my first grade class next year. 

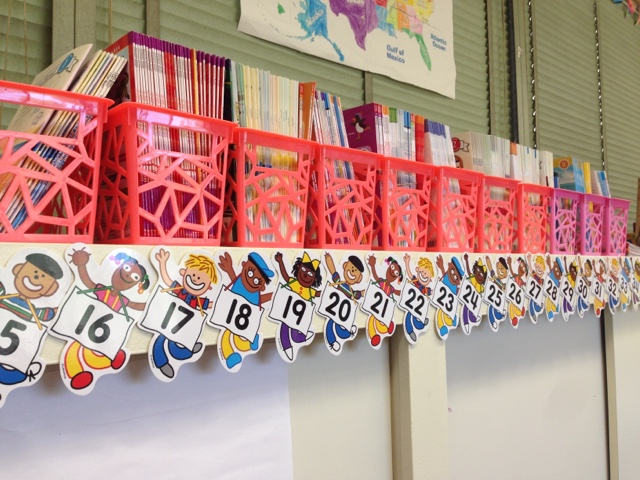
I found these adorable bunting flag banners in the Dollar Spot section of Target!  At $3 apiece, they were "expensive" for the dollar section (it feels like all the good stuff for teachers is three dollars now instead of one dollar), but how cute do they look hanging from my ugly window blinds?!  Totally worth the purchase.  Well done, Target.  


All the students have their writing journals and math journals on top of their desk to show their parents when they come to visit.  I have students do the majority of their writing and the majority of their math in their respective journals.  (While the downside of frequently using journals is that there is less work to send home each week to parents, the plus side is that at the end of the year, students have a great compilation of their best work, and a record of their learning progression from the beginning of the year to the end.) 


When I first moved into this classroom three years ago, I felt panicky that there was so much bulletin board space (at least twice as much bulletin board as my last classroom).  But the longer I'm here, the more I feel the opposite: I don't have enough bulletin board space!  I use so much of the bulletin board for interactive learning (such as our weather/calendar/days of school components, CAFE reading strategies, and anchor charts), there's little room left over for students' work!  I may need to start hanging student work from the ceiling.  The ceilings are extremely high in my classroom, so I'd need to track down a huge ladder to help me reach.  (Speaking of which, does anyone have any great strategies for hanging things from the ceiling?)


So that's my classroom, folks!  Overflowing with (useful!) clutter, but at least I know where everything is!  Unless I'm looking for where I set my Starbucks down.  Or my iPad.  That's when I recruit my sharp-eyed students to help me. :)


Tuesday, January 12, 2016

Teacher's Guide to Organizing Your Computer Files, Part 1

I am fastidious about keeping my computer files organized.  EVERYTHING must go in a folder, and most of my folders have more folders within folders.  Ask me for anything I may have on my computer, and I can find it in seconds.  The packet I made for Back to School Night two years ago?  Check.  The unit on money I bought on TPT last spring?  Check.  Those Halloween-themed writing prompts?  Check.  

I have teacher friends whose computer desktops are filled with random files and TPT products that have yet to find a digital home.  


Every teacher needs the following digital folders in her computer to organize the hundreds (thousands?) of teacher resource files we all have floating around on our hard drives:


RECOMMENDED TEACHER FOLDER #1: Lesson Plans by Season (True, nearly all the files in these folders are not formal lesson plans, but in fact either printables, center activities, or templates for art projects, but I've always just titled my folders "Lesson Plans" because it covers everything I may use in a lesson for that topic.)


Within that folder (Lesson Plans by Season), I have a subfolder for each holiday I have resources for.  When titling folders by month, I always put the number of the month first, so that the folders will be in order from January to December (otherwise the folders would default to alphabetical order - and seeing April listed first, and then August and December would just throw me into an OCD tailspin).  Since Easter is always in a different month, that's the only folder that isn't placed in sequential order of the year's holidays.  Same goes for the 100th Day of School.  


Does it matter if the Valentine's Day worksheets/resources are for math, spelling, writing, etc?  Unless you literally have dozens of files relating to Valentine's Day, the answer is NO.  If it is a Valentine's Day-themed resource, it can all just go together in the Valentine's Day folder. And as long as your files themselves are labeled appropriately (which may be a whole other blog post), you should be able to find what you need within that one folder.  


RECOMMENDED TEACHER FOLDER #2: Lesson Plans by Subject

This folder is going to have a LOT of subfolders.  Every subject you teach (which, for us self-contained elementary classrooms, is all of the subjects) needs its own folder within the "Lesson Plans by Subject" folder. 


Each of these subject folders should in turn have a number of subfolders within them as well.  For example, my Phonics folder: 


My Phonics folder contains subfolders for all the phonics rules we learn in first grade:

  • Beginning consonant sounds
  • Ending consonant sounds
  • Long vowels 
  • Short vowels
  • R-Controlled Vowels
  • Variant Vowels
  • Digraphs
  • Dipthongs
  • Inflectional Endings
And within those folders, then another series of subfolders, as you can see in the screen shot of my Short Vowels folder above, which includes Short A, Short E, Short I, Short O, and Short U. 

More to come on ways to keep those computer desktops clear of your TPT resources!

Saturday, November 21, 2015

10 Clever Uses for Baking Trays in the Classroom

I love my classroom set of baking trays.  (I always want to call them cookie sheets, but technically cookie sheets are completely flat, and these are definitely not.)  I bought six of them from the Dollar Tree several years ago, and I keep finding new ways to utilize them. Here are my top ten:

1. Use with magnetic poetry words to build sentences. 
I have sets of magnetic words (also from the Dollar Tree) that the kiddos can use during Word Work Center's. The magnetic pieces stick to the metal tray, and with the raised edges, the kids are less likely to mix up the sets. (My self-diagnosed OCD goes into overdrive just thinking about these word sets getting scrambled. That's also why I wrote numbers on the back of each piece with a metallic Sharpie, so I would know if word pieces ended up in the wrong container. The picture above shows a child working with set #2.) 

2. Use with magnetic letters to form words and practice spelling. 
I have two tubs of giant magnetic letters, also for Word Work during Literacy Centers time.  I used to have students stand at the white board in front of the room to arrange the letters into words, but with these trays working as little miniature metal versions, I can now have a group sitting at a table for this. 

Since I keep all the letters jumbled together into one big mix, there's no worry of keeping sets separated, but if you had distinct sets of the alphabet, the trays could also serve to (at least try to) contain those sets.

3. Use with puzzles to keep sets together when students work side by side. 
I have a ton of puzzles (also purchased from the Dollar Tree!) that I pull out when I do Critical Thinking Centers. The kids love using them, and I love seeing them use problem-solving strategies to complete them. I don't love the fact that my kids loose pieces constantly. What happens is, pieces fall to the floor, and then disappear to the same place as missing socks, hair ties, and ball point pens. The darlings will also mix up and switch pieces with their neighbor's puzzle (which of course, makes me insane on the inside, but what can you do?).  Having the students keep all their pieces on their tray has helped this a lot. (Although, as evidenced in my picture, some of your littles will still want to build directly on the table instead of their tray.)

4. Use with Play Doh to practice spelling patterns. 
I occasionally bring out Play Doh for a Word Work center, and let the kids form their spelling words with it.  It gives the kids a kinesthetic connection to the week's spelling pattern, and strengthens their fine motor skills. My biggest rule about Play Doh (aside from "Don't eat it,") is they have to keep all of their Play Doh inside the tray. (I also have a rule about not mixing the colors, and a rule about staying focused on the words instead of building unicorns and motorcycles. Maybe I have too many rules. . . A thought for another time.) Before I started using the trays along with the Play Doh, you would not believe how much of the stuff ended up on the floor.  So much that I swore off Play Doh in my classroom for a long time. The trays solve most of these problems for me though, because in addition to keeping (most) of the Play Doh on the table instead of the floor, the trays also serve an added bonus of preventing colors from mixing. 


5. Use to trace letters and spelling words in shaving cream.  
Full disclosure: I have not done this in my classroom.  I consider it every year, and even suggest it as a great homework activity for parents to do with their kids (read: at home), but just can't justify the messiness/cleanup time/risk that a child would eat the shaving cream.  But I give you my blessing to try it yourself and let me know how it goes.  

6. Use with paint and marbles to create abstract art, a la Jackson Pollack. 
I don't have any pictures to post of this art project, but the link below gives you a great idea:

7. Use with water cups while painting to prevent disastrous spills. 
If you place the water cup and paints on a tray in the middle of the table, it will keep any spilled water from knocked cups inside the tray instead of on the floor/art work/kids.  Some of you might be thinking to yourselves, Just use less water in the cup, so that way there will be less water everywhere when one inevitably gets knocked over. An excellent point, but let me say this to you in response: filling the cup with a little more water makes the cup heavier (and thus less likely to tip in my experience), and allows for more paintbrush rinsing before having to dump and refill. 

8. Use during Words Their Way spelling sorts to keep words from mixing with a partner's. 
I use the "scribble-with-a-different-colored-crayon-on-the-back-of-the-words-before-cutting" trick to help students keep their words separate, but when I want them to do their Words Their Way sorts at a Center table, papers are more easily mixed up.  By giving each kid a tray to sort their words on, this is (somewhat) prevented.  (There will always be a few students who manage to lose half their words in a time span of ten minutes however, and in those cases you're just glad they managed to keep half of their words at all.)

9.  Use as a lap board for kids who don't like working at a desk. 
I have a few kids every year who don't want to sit at their desk.  I have other options for these students, such as small rugs on the floor, or standing, but occasionally they like to just sit in a chair with their work in their lap.  In these rare cases, I've given them a tray to use as a lap board.  (You can also just use a clipboard for these situations, but the tray holds their crayons/pencil as well and a clipboard does not.)

10.  Create a cutesy magnet reminder board, as seen in tons of cute Pinterest posts.  
I haven't made one, but it's on my "I would love to make this" list!

Thursday, November 19, 2015

Assessing Sight Word Fluency

Your iPad is your best friend when it comes to testing for students' sight word fluency!  But I'm getting ahead of myself.  

I do my best to formally assess each student on his/her sight word recall (using the Pre-Primer and Primer Dolch word lists) once a month, beginning with the first week of school.  I assess students again on these same words around the end of September, and then a third time around Halloween.  Historically by this point, all students but one or two will be able to demonstrate mastery with 100% accuracy in this area. Because these two lists are words that should have been learned and mastered in kindergarten, many students will show me that they know all the words during my first or second assessment.  (Whew!  I love it when this happens, because this means more of my time can be spent with small groups instead of assessing one-on-one.)  As soon as a student is able to recite an entire word list with 100% accuracy, I snip the corner off that student's assessment sheet so I can easily see that they do not need to be assessed in that area again. 


Which brings me to my Fluency Assessment Binder: 


I use a set of Avery binder dividers, numbered 1-31.  These, I'm sure, were intended to be used for each day of the month, however they work perfectly in my Fluency Assessment Binder (or any other binder requiring a tab for each student).  Students are assigned a number at the beginning of the year, and I file students' reading assessment data in this binder under their numbered tab.  This allows me to re-use the same dividers year after year (those suckers were expensive), and I don't need to spend the time meticulously printing beautiful and neat labels with each student's name on each tab.  EASY PEASY, right?  

Full-disclosure: if you have a class of students that numbers more than 31, as I did last year, you will not have a tab for each student.  I think Avery makes tabs that go up to higher numbers, but a trip to Staples to investigate at the start of the year just didn't happen.  And then I decided there were just too many other things to worry about than making sure the last four students at the end of the alphabet had an individual tab in my assessment binder.  So, if you find yourself in the same position as me last year, do what I did: paper clip the groups of papers for students numbered 31 through 35, and stick them at the end of the binder with no tab at all.  Surprisingly, this hackneyed system of separating papers worked just fine.  Now this year I'm back to a class of only 26 students, and all is well again with the world.  

I copied enough sheets of the Sight Word Fluency Checklists to place one behind each student's number tab in my binder.  There are three columns, for each possible assessment date during the first trimester.  (As I mentioned before, some students will not need to be assessed more than once, if they can read all words during the first assessment.)  If, after three assessments however, a student has still not mastered his sight words, simply make a second copy of the Sight Word Fluency Checklist, and place it in your Fluency Assessment Binder in front of the first copy.  Continue to do this, assessing about once a month, until the student is able to show mastery of all required words.  


Here's where the iPad comes in!  (Side note: You can do all of this with a lap top computer, or even in front of a desktop computer.  I just like the flexibility of the iPad, which allows you to find a quiet spot anywhere.)  I believe that all iPads can now download for free the apps for Pages, Numbers, and (the app I use during Fluency Assessments) Keynote.  Keynote is just Apple's version of PowerPoint, and while it took me a minute or two to get the hang of it, it is actually pretty simple to use.  

I used the Keynote app to create a slideshow of the Dolch Sight Words Pre-Primer list (and later, additional slideshows for each subsequent Dolch List).  Simply type one word on each slide, (making sure to use the same word order that you have on your checklist).  If you are creating your own checklist, do NOT list the words in alphabetical order.  Students need to see these words in a random order, out of context, and still be able to read them correctly.  

Find a quiet place for you and your student to sit, and then set the slideshow to run, with a three-second delay between transitions to the new slide (sight word).   All you need is your iPad, (either propped up where the student can see, or in the student's lap), and a clipboard, pencil, and that student's Fluency Checklist.  Once the slide show begins to play, the student only has a few seconds to answer before the slide show moves on to the next slide/word.  Everything is automated through the iPad, and therefore everyone gets a completely fair and objective assessment.  Each student is guaranteed to receive the same amount of time per word as everyone else.  (Plus, I've found there are fewer comments from the students such as, "Slow down, you're going too fast!" or, "Go back, I missed one!")  The only thing your student needs to do is say the words aloud as he/she is able to read them, and your only job is to either place a check mark next to a word to show that it was read correctly, or leave the box blank, to indicate that no response was given.  I will write in the box whatever word (or beginning sound) the child does say, however, as these extra notes can often help me guide instruction in reading groups.  

And that's it!