Showing posts with label Back to School. Show all posts

Wednesday, August 17, 2016

Tips for Positioning Bulletin Board Letters

BEFORE YOU BEGIN: Test to make sure your painters tape will not tear your bulletin board paper when peeled off of it!  Some of the thinner (read: cheaper) bulletin board paper won't stand up against painters tape/masking tape.

1. Measure out a piece of tape the length of your bulletin board.

2. Remove the tape after finding the appropriate length, and then place it down on a table where you have room to lay out your letters.  (Here I've bypassed the use of my Cricut to use the pre-cut letters from Lakeshore.)

3. Arrange your letters across the tape, spacing them however you'd like them to be on your bulletin board.  Once you've found the correct spacing and positioning of letters, slide them under your tape (as shown below).

4. Gently peel the strip of tape off the table, taking your letters along with it, and carefully take it across the room to the bulletin board you're working on.

5. Position the painters tape on your bulletin board, to where where you'd like your letters to ultimately be affixed. Staple the letters to the bulletin board while everything is still taped to the wall.

6. After stapling your letters to the wall, carefully remove the painters tape, leaving the letters behind in exactly the right place!


Tuesday, August 16, 2016

Teachers' Back to School To-Do Lists

I know these types of Back-to-School lists are very different for every teacher, depending on the type of school you teach at, your grade level, your classroom configuration . . . I could go on and on.  But these are MY Back-to-School To-Do Lists, which hopefully will help you to create your own (or perhaps remind you of something you'd forgotten)!

Go Shopping:
✏︎ Composition books in specific colors (green for math, yellow for spelling) from Target ($0.50 apiece)
✏︎ Student Work folders (from whichever office supply store has them on sale the cheapest)
✏︎ Primary Writing Journals from Dollar Tree ($1.00 apiece)
✏︎ Extra boxes of Crayola Crayons and Glue Sticks (because we always need extra)
✏︎ Rolls of fadeless bulletin board paper from Lakeshore
✏︎ Rolls of corrugated borders from Lakeshore
✏︎ Name plates for desks
✏︎ New birthday poster 
✏︎ New "Who lost a tooth?" poster
✏︎ ALL THE THINGS in the Target Dollar Spot 😉
✏︎ Stress balls for students who may need help calming themselves down
(I usually also buy myself a new set of colorful Sharpies, and a new box of my favorite pens, regardless of how many I have stashed in a tub in my classroom already.  Just because it makes me happy.) 

Once I Have My Class Roster:
★ Update class website with students' birthdays
★ Write names on Birthday Poster
★ Pre-Write names on Happy Birthday certificates (keep in a page protector and hang next to
     Birthday poster)
★ Create Star of the Week calendar/schedule
★ Update class website with students' Star of the Week date assignment
★ Update ClassDojo with students' names
★ Create/look up student accounts for online programs:
          - Spelling City
          - Read Theory
          - Accelerated Reader (AR)
          - Mathletics
★ Create labels for workbooks and journals:
          - Writing Journals
          - Math Journals
          - Spelling Journals
          - Math Workbook
          - Handwriting Workbook
          - ELA Workbook
★ Create labels for filing tabs (for completed work bin)
★ Write names on desk name plates
★ Write names on die-cuts for Welcome Back bulletin board
★ Create new Class Jobs board with students' names
★ Print and laminate website password cards
★ 


More Getting Ready:
✓ Prepare Math Journals:
        ⚬ Pre-number pages (odd pages only)
        ⚬ Affix ruler tape to cover
✓ Prepare Spelling Journals:
        ⚬ Stamp top corners of pages with letter stamps
        ⚬ Cut dividers from card stock, glue inside

Classroom Set Up & Decoration
✓ Plan theme/color scheme
✓ Put up bulletin board paper and borders
         ✜ Star of the Week 
         ✜ Calendar
         ✜ Welcome Back to School
         ✜ Religion
✓ Arrange desks and tables depending on class size
✓ Clean tops and insides of desks
✓ Number desks with Sharpie Paint Pens
✓ Pull textbooks out of cabinet, lay on corresponding numbered desk
✓ Hang bunting banners across windows
✓ Hang "Lost a Tooth" & Happy Birthday poster
✓ Prep classwork folders with highlighters (see my post HERE on how I do this)

What do YOU do to get yourself ready for 
the first week of school???


Monday, August 15, 2016

Hand-Painted Teacher's Pencil Shoes

My hand-painted pencil shoes have been receiving a lot of attention lately, especially after being featured by @targetteachers' Instagram!  They've received more likes and comments than any other picture I've posted on Instagram, and have been the subject of countless direct messages from followers who want more information about how I made them.  Well, here is everything you need to know about making your very own pair!

{If you aren't up to the task of making your own, send me an email at primarycircus@gmail.com to inquire about ordering a custom pair!}


THE MATERIALS:
Start with a pair of white canvas shoes. I bought mine from Target for $16 or $17. I believe Walmart also sells an inexpensive pair as well. You will also need:
~ Acrylic paint: Pink, Yellow, Gold (or very light brown/tan) Black, and Green
~ Paintbrushes: One very small, and one medium-sized
~ Painters tape/masking tape
~ Mod Podge


Remove the laces from your shoes before you begin. Then use painters tape (washi tape will work too, in a pinch) to mark the edges of the pink "eraser" portion of your shoes.  Line up your shoes to ensure you mark both shoes at roughly the same place.


Paint the heel of each shoe pink.  I needed to use several coats of paint, but you'll be able to tell exactly where you may need a little more coverage once it dries. (As a rule of thumb, I like to let each coat of paint dry before adding another layer.)


After completing the heels, I move on to paint the rest of the shoe yellow, taking extra care between the shoelace holes and along the edge of the rubber sole. I like to use a tiny (like, really tiny) brush for these areas, and then a larger brush (like the size that comes with most kids' watercolor trays) for the bigger areas of canvas.  I found that it also helps to thin the paint a bit with water when getting into the trickier areas. (Keep in mind however, the more you dilute the paint, the greater the number of paint layers you'll need to apply.)


It's not necessary to go all the way to the edge of the toe, since this area will be painted two other colors.  (But don't forget to paint the top of the tongue flap inside as well!)


Here I made a scalloped line with my paintbrush before filing in the toe area with more gold paint. There is a twinge of shimmer in the gold paint, but once the entire shoe is finished it looks nice and just adds a bit of dimension (not flashy at all). 


Finish filling in the rest of the toe with gold paint to represent the wood of a sharpened pencil.


Just like I did with the gold scallops, use a tiny paint brush to draw a slightly curved line with black paint to mark where the black will go.  Start off making your line closer to the tip of the shoe, rather than further. (That way you can just add a bit more paint if you don't like the curve you made, or if one toe is a bit different from the other. 

When doing the toes, I like to keep both shoes side by side so I can ensure both the left and the right shoes are painted evenly. 


Let everything dry again before going back to touch up any areas that need a bit more coverage. (As I said before, it's a lot easier to tell where you need an additional coat once it's completely dry.)

Once you've added all the extra coats of pink, yellow, gold, and black, and everything is completely  dry, it's time for the trickiest part of all: the double green lines, and the black No. 2.  Again, do not begin this step until the yellow paint is absolutely, 100% dry. (Trust me. You will mutter - or scream - words that are not appropriate for the classroom.)  If you paint over wet yellow paint with black paint, the colors will bleed together in a rush of swirled liquid, while you watch the lines of your carefully crafted "N" (the beginning of No. 2) travel half an inch across the canvas. 

If this does happen: carefully blot the offended area with a paper towel, and let everything dry. (Yes, it will still look pretty messed up at this point.) Then, once dry, paint over the messed-up area with yellow paint. You may need several coats to cover your mistake, but it should cover eventually. Then try again! (And even if there is a faint smudge peeking through the yellow, no one is going to notice once the shoes are on your feet.)

************************

When painting the No. 2 and the green stripes, use a veerrrrrryyy thin paint brush. I also recommend thinning the paint a bit so that the brush glides easily across the canvas of the shoe. If you need to, you can write it with a pencil first, and then paint over the pencil marks.  (You could even do the whole thing with a black Sharpie if you'd like, but I personally prefer the look of paint.)

For the green stripes, I drew them on with my paintbrush free-hand, but you could also use painters tape to ensure a perfect line. 

Once again, allow both shoes to completely dry. Then, use a thick paintbrush to coat the entire surface with a (not thin, but not too thick either) layer of Mod Podge.  I used two layers, letting everything dry between coats. And don't panic when it appears that you are ruining your handiwork with a milky-white layer of glue. It will all dry clear, and prevent the paint from running off your shoes the second you get hit with a neighbor's lawn sprinkler while walking your dog. 

{That being said, THESE SHOES ARE NOT WATERPROOF.  The Mod Podge will make the paint fairly water-resistant, however if the weather forecast calls for rain, I recommend leaving the pencil shoes at home.}

Good luck!  I would love to see your creations! If you post them on Instagram, please tag me @primarycircus so I can get a peek!  


Tuesday, August 19, 2014

New (School) Year's Resolutions

I know New Year's resolutions are supposed to begin on January 1st, but I've always felt that the fresh start associated with the "New Year" really begins in the fall, with the beginning of a new school year.  So, in the spirit of my own personal New Year's Eve (the day before the first day of school), here are my  New (School) Year's Resolutions:

Resolution #1: Write more thank you notes.
There are so many people who do wonderful and generous things for me throughout the year.   I need to be better this year about writing a proper thank you note to let them know how much they mean to me.  I've stocked my desk with fun thank you notes and cards to make it easier to keep thank-yous a priority.


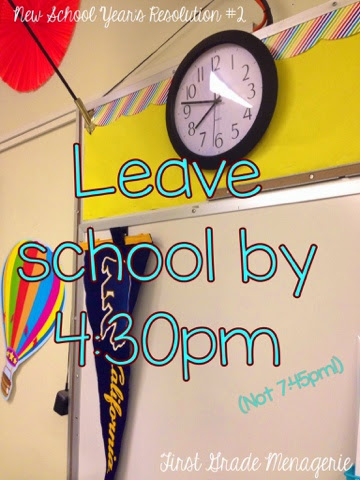
Resolution #2: Leave by 4:30pm (okay, 5:00pm at the latest) everyday.
I need a social life!  I can't just go to work, go home, go to bed, repeat.  This year I'm going to make it a point to leave at a reasonable hour every day.  (Unless report cards are due.  That's a different story!)


Resolution #3: Change student work on my bulletin boards more often. 
I need to just put students' writing up each week, even if it's just a quick-write, or I don't have time to make a cutesy heading with letters at the top of the board.  In the picture below, I didn't make a heading, list the standards I covered, or even keep the board consistent with the same assignment (which makes me cringe to look at it now) - but the important things is that the parents loved seeing their kids' work when volunteering in the classroom, and I got it done.  I didn't wait to make it perfect first - otherwise I would have the same work on the board for three months before I'd change it.  


Resolution #4: Do more art.
I love doing art with the kids.  It's probably one of my most favorite things, and yet I get caught up in covering all the material I need to get through by the end of the year, so art is always the first thing to go when I feel like I'm falling behind.   But the kids need it, it makes them happy.  And it makes me happy too.  And a happy teacher = happy students.

Resolution #5: Pray more often throughout the day - both with the kids and to myself.
I want to try to remember to turn to prayer instead of Starbucks when I get stressed or overwhelmed during the day.  One of the reasons I wanted to teach at a Catholic school in the first place was so I could help my students in their faith, so I need to remind myself to share the experience of spontaneous prayer with my students.  

Who knows how well (or for how long!) I'll be able to stay true to my resolutions!  Leave your own New School Year's resolutions in the comments section!