Showing posts with label Art. Show all posts

Monday, August 15, 2016

Hand-Painted Teacher's Pencil Shoes

My hand-painted pencil shoes have been receiving a lot of attention lately, especially after being featured by @targetteachers' Instagram!  They've received more likes and comments than any other picture I've posted on Instagram, and have been the subject of countless direct messages from followers who want more information about how I made them.  Well, here is everything you need to know about making your very own pair!

{If you aren't up to the task of making your own, send me an email at primarycircus@gmail.com to inquire about ordering a custom pair!}


THE MATERIALS:
Start with a pair of white canvas shoes. I bought mine from Target for $16 or $17. I believe Walmart also sells an inexpensive pair as well. You will also need:
~ Acrylic paint: Pink, Yellow, Gold (or very light brown/tan) Black, and Green
~ Paintbrushes: One very small, and one medium-sized
~ Painters tape/masking tape
~ Mod Podge


Remove the laces from your shoes before you begin. Then use painters tape (washi tape will work too, in a pinch) to mark the edges of the pink "eraser" portion of your shoes.  Line up your shoes to ensure you mark both shoes at roughly the same place.


Paint the heel of each shoe pink.  I needed to use several coats of paint, but you'll be able to tell exactly where you may need a little more coverage once it dries. (As a rule of thumb, I like to let each coat of paint dry before adding another layer.)


After completing the heels, I move on to paint the rest of the shoe yellow, taking extra care between the shoelace holes and along the edge of the rubber sole. I like to use a tiny (like, really tiny) brush for these areas, and then a larger brush (like the size that comes with most kids' watercolor trays) for the bigger areas of canvas.  I found that it also helps to thin the paint a bit with water when getting into the trickier areas. (Keep in mind however, the more you dilute the paint, the greater the number of paint layers you'll need to apply.)


It's not necessary to go all the way to the edge of the toe, since this area will be painted two other colors.  (But don't forget to paint the top of the tongue flap inside as well!)


Here I made a scalloped line with my paintbrush before filing in the toe area with more gold paint. There is a twinge of shimmer in the gold paint, but once the entire shoe is finished it looks nice and just adds a bit of dimension (not flashy at all). 


Finish filling in the rest of the toe with gold paint to represent the wood of a sharpened pencil.


Just like I did with the gold scallops, use a tiny paint brush to draw a slightly curved line with black paint to mark where the black will go.  Start off making your line closer to the tip of the shoe, rather than further. (That way you can just add a bit more paint if you don't like the curve you made, or if one toe is a bit different from the other. 

When doing the toes, I like to keep both shoes side by side so I can ensure both the left and the right shoes are painted evenly. 


Let everything dry again before going back to touch up any areas that need a bit more coverage. (As I said before, it's a lot easier to tell where you need an additional coat once it's completely dry.)

Once you've added all the extra coats of pink, yellow, gold, and black, and everything is completely  dry, it's time for the trickiest part of all: the double green lines, and the black No. 2.  Again, do not begin this step until the yellow paint is absolutely, 100% dry. (Trust me. You will mutter - or scream - words that are not appropriate for the classroom.)  If you paint over wet yellow paint with black paint, the colors will bleed together in a rush of swirled liquid, while you watch the lines of your carefully crafted "N" (the beginning of No. 2) travel half an inch across the canvas. 

If this does happen: carefully blot the offended area with a paper towel, and let everything dry. (Yes, it will still look pretty messed up at this point.) Then, once dry, paint over the messed-up area with yellow paint. You may need several coats to cover your mistake, but it should cover eventually. Then try again! (And even if there is a faint smudge peeking through the yellow, no one is going to notice once the shoes are on your feet.)

************************

When painting the No. 2 and the green stripes, use a veerrrrrryyy thin paint brush. I also recommend thinning the paint a bit so that the brush glides easily across the canvas of the shoe. If you need to, you can write it with a pencil first, and then paint over the pencil marks.  (You could even do the whole thing with a black Sharpie if you'd like, but I personally prefer the look of paint.)

For the green stripes, I drew them on with my paintbrush free-hand, but you could also use painters tape to ensure a perfect line. 

Once again, allow both shoes to completely dry. Then, use a thick paintbrush to coat the entire surface with a (not thin, but not too thick either) layer of Mod Podge.  I used two layers, letting everything dry between coats. And don't panic when it appears that you are ruining your handiwork with a milky-white layer of glue. It will all dry clear, and prevent the paint from running off your shoes the second you get hit with a neighbor's lawn sprinkler while walking your dog. 

{That being said, THESE SHOES ARE NOT WATERPROOF.  The Mod Podge will make the paint fairly water-resistant, however if the weather forecast calls for rain, I recommend leaving the pencil shoes at home.}

Good luck!  I would love to see your creations! If you post them on Instagram, please tag me @primarycircus so I can get a peek!  


Saturday, November 21, 2015

10 Clever Uses for Baking Trays in the Classroom

I love my classroom set of baking trays.  (I always want to call them cookie sheets, but technically cookie sheets are completely flat, and these are definitely not.)  I bought six of them from the Dollar Tree several years ago, and I keep finding new ways to utilize them. Here are my top ten:

1. Use with magnetic poetry words to build sentences. 
I have sets of magnetic words (also from the Dollar Tree) that the kiddos can use during Word Work Center's. The magnetic pieces stick to the metal tray, and with the raised edges, the kids are less likely to mix up the sets. (My self-diagnosed OCD goes into overdrive just thinking about these word sets getting scrambled. That's also why I wrote numbers on the back of each piece with a metallic Sharpie, so I would know if word pieces ended up in the wrong container. The picture above shows a child working with set #2.) 

2. Use with magnetic letters to form words and practice spelling. 
I have two tubs of giant magnetic letters, also for Word Work during Literacy Centers time.  I used to have students stand at the white board in front of the room to arrange the letters into words, but with these trays working as little miniature metal versions, I can now have a group sitting at a table for this. 

Since I keep all the letters jumbled together into one big mix, there's no worry of keeping sets separated, but if you had distinct sets of the alphabet, the trays could also serve to (at least try to) contain those sets.

3. Use with puzzles to keep sets together when students work side by side. 
I have a ton of puzzles (also purchased from the Dollar Tree!) that I pull out when I do Critical Thinking Centers. The kids love using them, and I love seeing them use problem-solving strategies to complete them. I don't love the fact that my kids loose pieces constantly. What happens is, pieces fall to the floor, and then disappear to the same place as missing socks, hair ties, and ball point pens. The darlings will also mix up and switch pieces with their neighbor's puzzle (which of course, makes me insane on the inside, but what can you do?).  Having the students keep all their pieces on their tray has helped this a lot. (Although, as evidenced in my picture, some of your littles will still want to build directly on the table instead of their tray.)

4. Use with Play Doh to practice spelling patterns. 
I occasionally bring out Play Doh for a Word Work center, and let the kids form their spelling words with it.  It gives the kids a kinesthetic connection to the week's spelling pattern, and strengthens their fine motor skills. My biggest rule about Play Doh (aside from "Don't eat it,") is they have to keep all of their Play Doh inside the tray. (I also have a rule about not mixing the colors, and a rule about staying focused on the words instead of building unicorns and motorcycles. Maybe I have too many rules. . . A thought for another time.) Before I started using the trays along with the Play Doh, you would not believe how much of the stuff ended up on the floor.  So much that I swore off Play Doh in my classroom for a long time. The trays solve most of these problems for me though, because in addition to keeping (most) of the Play Doh on the table instead of the floor, the trays also serve an added bonus of preventing colors from mixing. 


5. Use to trace letters and spelling words in shaving cream.  
Full disclosure: I have not done this in my classroom.  I consider it every year, and even suggest it as a great homework activity for parents to do with their kids (read: at home), but just can't justify the messiness/cleanup time/risk that a child would eat the shaving cream.  But I give you my blessing to try it yourself and let me know how it goes.  

6. Use with paint and marbles to create abstract art, a la Jackson Pollack. 
I don't have any pictures to post of this art project, but the link below gives you a great idea:

7. Use with water cups while painting to prevent disastrous spills. 
If you place the water cup and paints on a tray in the middle of the table, it will keep any spilled water from knocked cups inside the tray instead of on the floor/art work/kids.  Some of you might be thinking to yourselves, Just use less water in the cup, so that way there will be less water everywhere when one inevitably gets knocked over. An excellent point, but let me say this to you in response: filling the cup with a little more water makes the cup heavier (and thus less likely to tip in my experience), and allows for more paintbrush rinsing before having to dump and refill. 

8. Use during Words Their Way spelling sorts to keep words from mixing with a partner's. 
I use the "scribble-with-a-different-colored-crayon-on-the-back-of-the-words-before-cutting" trick to help students keep their words separate, but when I want them to do their Words Their Way sorts at a Center table, papers are more easily mixed up.  By giving each kid a tray to sort their words on, this is (somewhat) prevented.  (There will always be a few students who manage to lose half their words in a time span of ten minutes however, and in those cases you're just glad they managed to keep half of their words at all.)

9.  Use as a lap board for kids who don't like working at a desk. 
I have a few kids every year who don't want to sit at their desk.  I have other options for these students, such as small rugs on the floor, or standing, but occasionally they like to just sit in a chair with their work in their lap.  In these rare cases, I've given them a tray to use as a lap board.  (You can also just use a clipboard for these situations, but the tray holds their crayons/pencil as well and a clipboard does not.)

10.  Create a cutesy magnet reminder board, as seen in tons of cute Pinterest posts.  
I haven't made one, but it's on my "I would love to make this" list!

Tuesday, August 4, 2015

Creative to the Core: Tracing & Drawing with Carbon Paper

I learned some wonderful art techniques this summer at the Getty Center's Creative to the Core professional development workshop for educators. Here's one of many incredible ideas I took away from the class, on using carbon paper to recreate famous works of art. 

Directions:
Bottom Layer: Blank drawing paper (This will be the paper your final image is drawn on.)
Middle Layer: Carbon paper (Make sure the dark side of the paper facing down.)
Top Layer: The photograph or image you are transferring (Note that students will be tracing over this image with a ball point pen or pencil, so don't use originals that you want to keep perfect.)

You may want to consider stapling the three sheets together with several staples at the top, allowing students to flip the top two sheets as they monitor their progress, while preventing the papers from slipping or shifting (which would distort the final image).  

I practiced this myself using a color copy of a Franco de Sarto sketch (which is currently on exhibit at the Getty Center in Los Angeles).  I noticed that this brand of carbon paper is sensitive enough to distinguish varying levels of pencil pressure as I traced, allowing me to shade lightly in some areas, and darker in others as I followed the original artist's contours. 


The image on the left is a color copy of de Sarto's sketch that I used.  You can see where I drew over it with a black colored pencil. The image on the right is the result of the carbon paper imprints.

Students can then either sign their drawings and let them stand alone as their final product, or they can color their drawings with crayon, colored pencil, or watercolors to finish. 

I'm looking forward to trying this with my current class. (Just as soon as Amazon brings me the carbon paper I've ordered!)  And while I'm normally a fan of having students use color for everything, from art projects to math journals, in this case I'm planning on having students stop when they've finished drawing and shading with their pencils. Sometimes less really is more. 

Sunday, January 4, 2015

New Year, New Hobbies!

As I've written in a previous post, I've taken up the piano!  But I've also recently rekindled an old hobby of mine as well: art!  Except this time, instead of using traditional paper and pencil, I've been using the Paper by 53 app on my iPad, and the corresponding Pencil stylus . . . so I guess I'm still using Paper and Pencil!  Painting on the iPad has taken a little practice, but I'm starting to get the hang of it! I'd forgotten how relaxing it is to just sit and draw or paint for an hour or so. 


My favorite part of this app is the watercolor feature.  I love that when you hold the stylus (or your finger) on the screen, the color will pool in a very realistic way, creating a fine, slightly darker ring of color along the edges.   For the painting of the trees above, I used the watercolor feature, as well as the marker, colored pencil, and pen.  


I want to brainstorm ideas on how I might utilize something like this in the classroom during our art lessons.  I can't afford to buy my kiddos $60 styluses (they'd have to use their fingers),  but I think it would be fun to see the kinds of things my students could create with something like this.  

And I just realized what the best part would be of using this in the classroom: zero clean up!  No paint brushes to clean, no water cups to dump out, no stained shirts, no spills!  Don't get me wrong, I know there is a definite need for the tactile messiness of hands-on art projects.  But this would be a cool addition to all of that too, don't you think?  Hmm, but then I'll have to use a fortune's worth of color cartridges to print their work . . . Sounds like a possible Donors Choose proposal?  Something to think about . . .

What do you think?  Have any of you other blog readers used their iPads for art in the classroom?  I'd love to hear your comments!

Tuesday, August 19, 2014

New (School) Year's Resolutions

I know New Year's resolutions are supposed to begin on January 1st, but I've always felt that the fresh start associated with the "New Year" really begins in the fall, with the beginning of a new school year.  So, in the spirit of my own personal New Year's Eve (the day before the first day of school), here are my  New (School) Year's Resolutions:

Resolution #1: Write more thank you notes.
There are so many people who do wonderful and generous things for me throughout the year.   I need to be better this year about writing a proper thank you note to let them know how much they mean to me.  I've stocked my desk with fun thank you notes and cards to make it easier to keep thank-yous a priority.


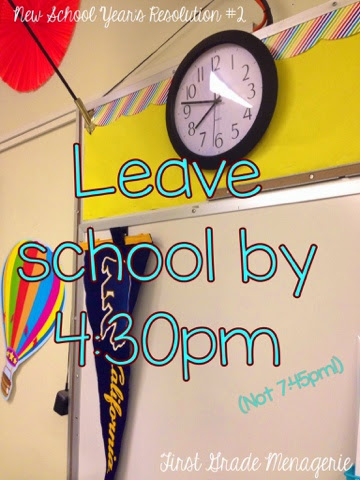
Resolution #2: Leave by 4:30pm (okay, 5:00pm at the latest) everyday.
I need a social life!  I can't just go to work, go home, go to bed, repeat.  This year I'm going to make it a point to leave at a reasonable hour every day.  (Unless report cards are due.  That's a different story!)


Resolution #3: Change student work on my bulletin boards more often. 
I need to just put students' writing up each week, even if it's just a quick-write, or I don't have time to make a cutesy heading with letters at the top of the board.  In the picture below, I didn't make a heading, list the standards I covered, or even keep the board consistent with the same assignment (which makes me cringe to look at it now) - but the important things is that the parents loved seeing their kids' work when volunteering in the classroom, and I got it done.  I didn't wait to make it perfect first - otherwise I would have the same work on the board for three months before I'd change it.  


Resolution #4: Do more art.
I love doing art with the kids.  It's probably one of my most favorite things, and yet I get caught up in covering all the material I need to get through by the end of the year, so art is always the first thing to go when I feel like I'm falling behind.   But the kids need it, it makes them happy.  And it makes me happy too.  And a happy teacher = happy students.

Resolution #5: Pray more often throughout the day - both with the kids and to myself.
I want to try to remember to turn to prayer instead of Starbucks when I get stressed or overwhelmed during the day.  One of the reasons I wanted to teach at a Catholic school in the first place was so I could help my students in their faith, so I need to remind myself to share the experience of spontaneous prayer with my students.  

Who knows how well (or for how long!) I'll be able to stay true to my resolutions!  Leave your own New School Year's resolutions in the comments section!

Wednesday, April 16, 2014

Easter Egg Hunt

I hear Easter Egg Hunt, and immediately think, "I need to make cute baskets for their eggs!"  Baskets turned out to be impractical (duh, right?) but a parent generously gave us these great little white boxes.  So of course, I had to come up with a way to decorate them to the nines, and came up with this!


It was so easy!  I started by giving each kid some Easter egg designs to color and cut out. 


Step 2: Cut strips of green paper for the grass, and cut "fringe" along one side. 


Step 3: Glue the paper eggs to the sides of the boxes first, then glue the grass down over them.  (I told my kids it was okay for the eggs to be half covered, because when they hunt for their eggs in the grass later, half of those eggs will be buried in the grass, too!


Let everything dry, and voila!  Beautifully decorated Easter boxes!


Friday, April 11, 2014

Lion Drawings

Here is the latest bit of art that I did with my students. I try to do an art project of some kind every Friday, and this was the most recent "Artwork Friday Masterpiece."  A lion is surprisingly easy to make, by drawing two hearts:  one heart, then another upside down heart, with opposite points touching. Add some eyes, ears, a triangle nose, and a flowing mane all around, and you pretty much have yourself a lion!


Sunday, April 6, 2014

Paul Klee Art Projects

Paintings inspired by Paul Klee's Castle & Sun

 Oil Pastel Drawings inspired by Paul Klee's Senecio